Integration with accounting system, POS

To make integration with Poster POS watch the video on connecting the plugin, please contact us if you need detailed instructions.
Integration Guide for integrating the inCust loyalty program into the Poster accounting program
1. Plugin Installation
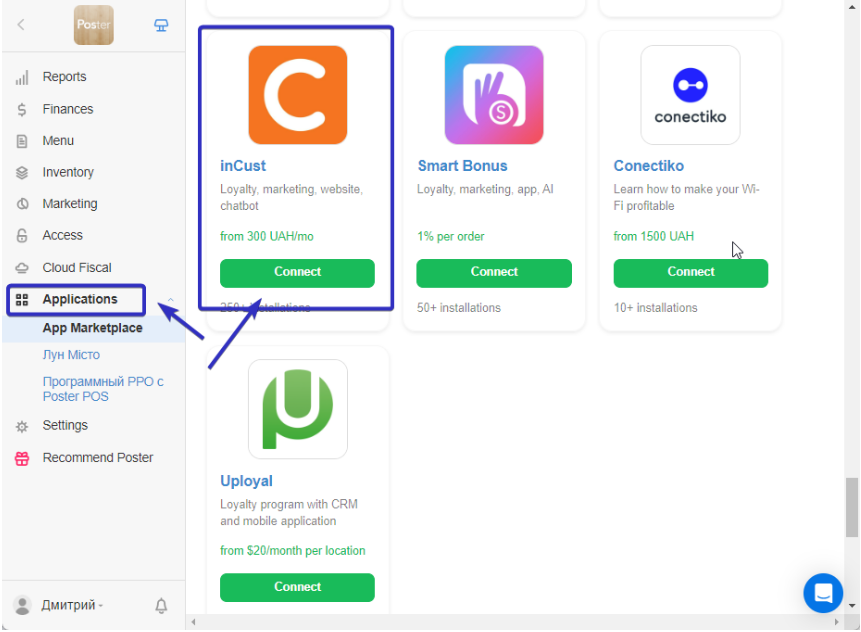
To connect the inCust plugin, you need to go to the administrative panel of Poster:
Applications -> App Marketplace -> Loyalty -> InCust -> Connect
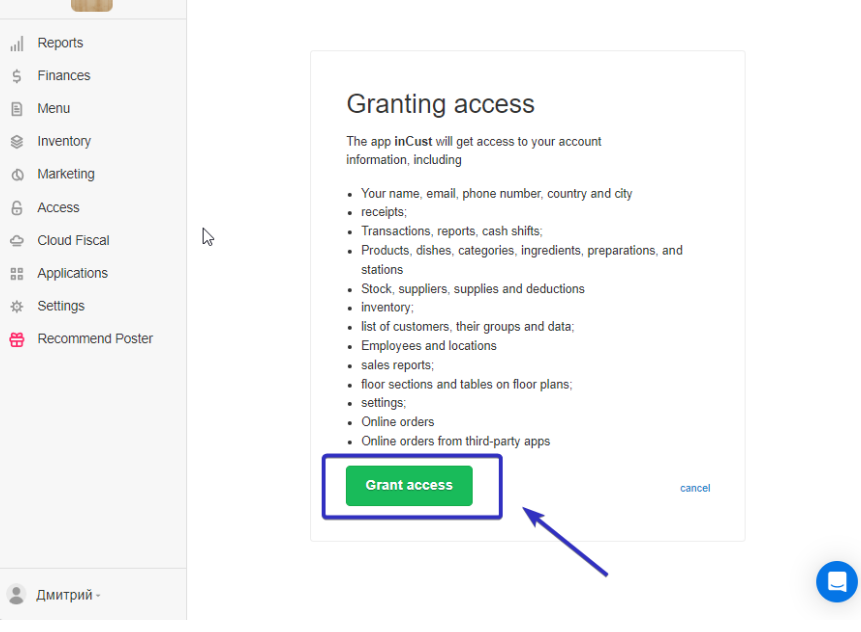
Next, grant access to the application by clicking the “Allow Access” button.
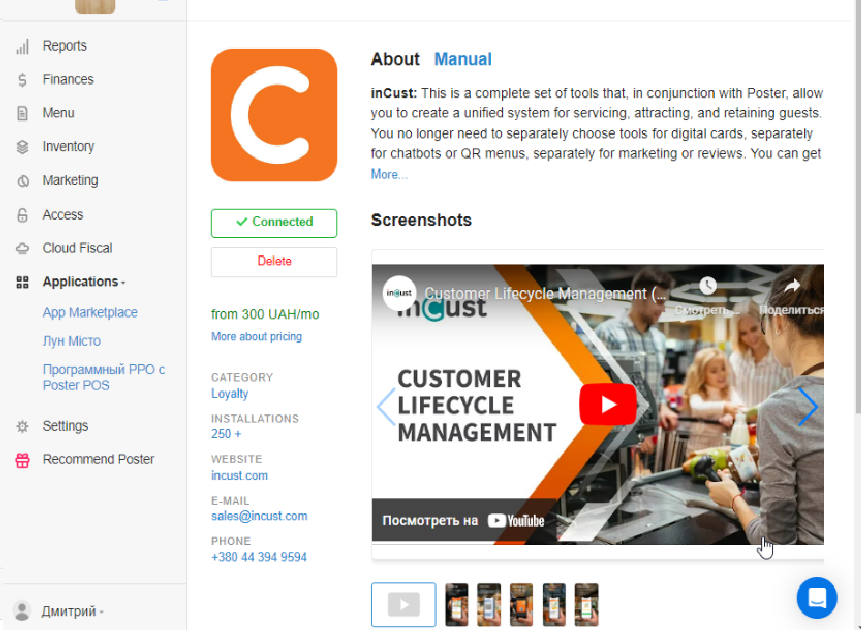
Your plugin has been installed!
2. Required data for integrating the inCust terminal with the Poster cash register
Next, you need to establish a connection between the Poster cash register and the inCust terminal. For this, you will need:
- Business account in Poster
- Poster customer number
- Poster establishment ID
- Poster cash register ID
a) Account of business in Poster – you can find this parameter in the Poster administrative panel Settings -> General -> Address in Poster
**you will need the part before .joinposter.com
As well as you can take it from the first part of the link in your browser, an example is in the screenshot:
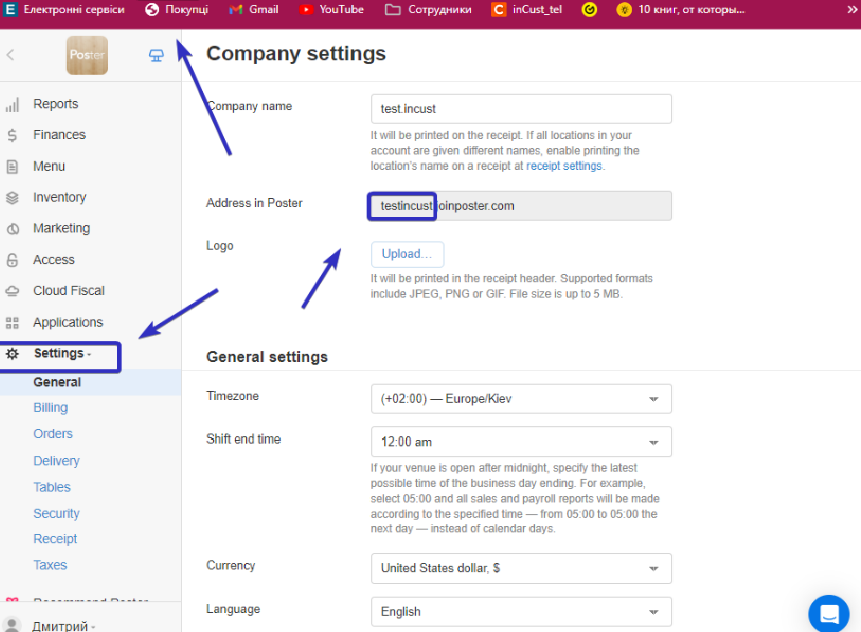
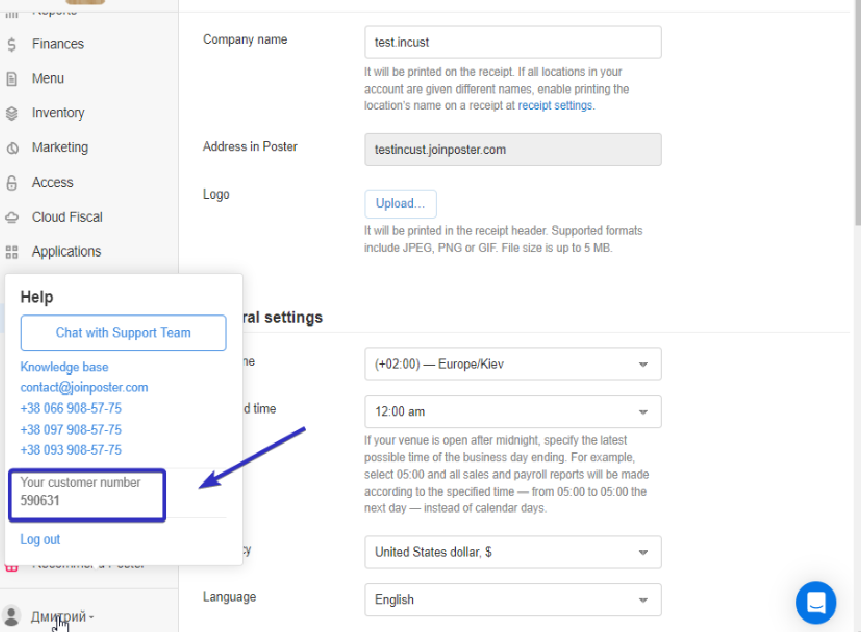
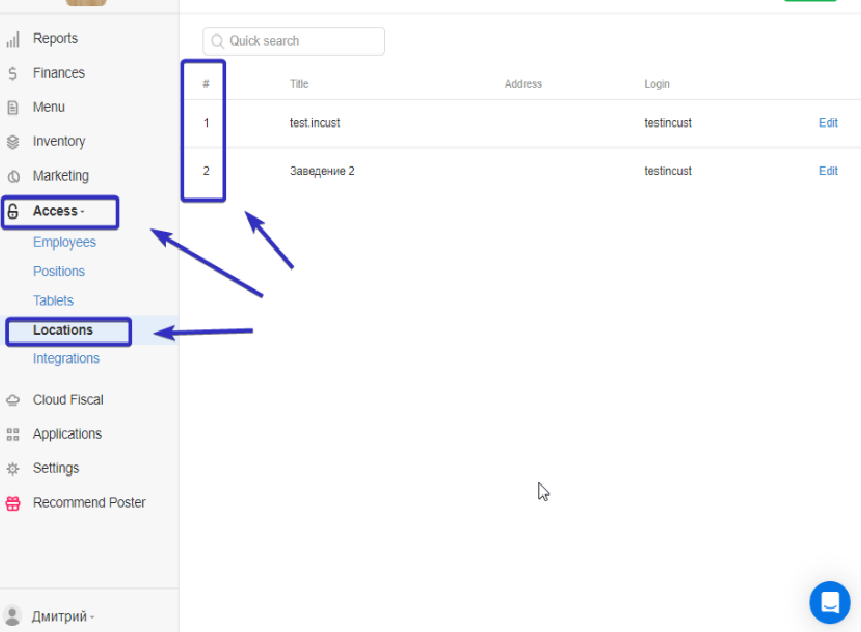
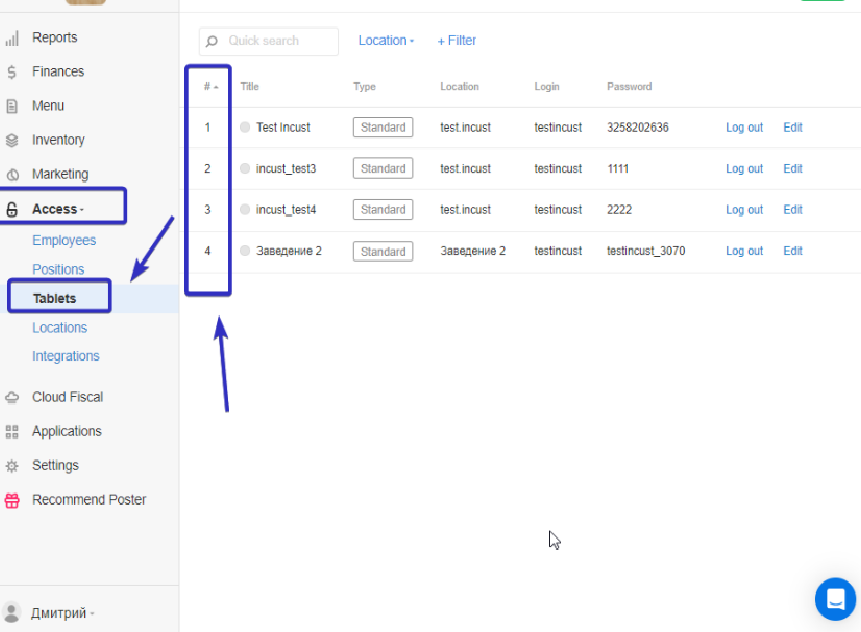
Now you have all the necessary information to establish a connection with the inCust Terminal.
2.1 Setting up the connection with the inCust Terminal
Go to the InCust business panel at https://business.incust.com/
Navigate to the menu – Settings -> Terminals and Salespeople and select the necessary terminal for integration.
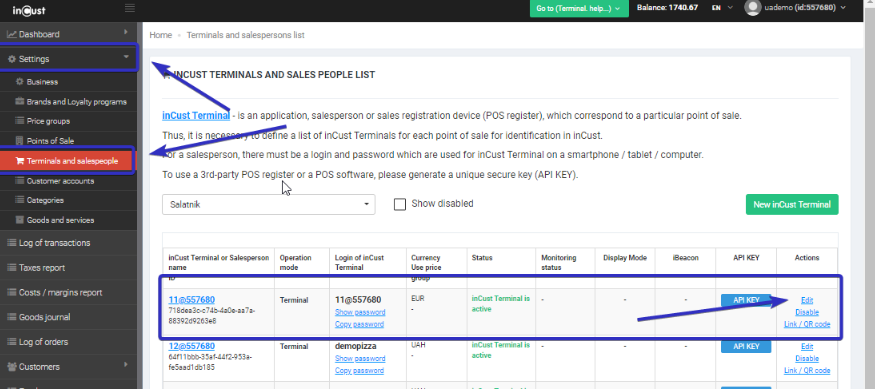
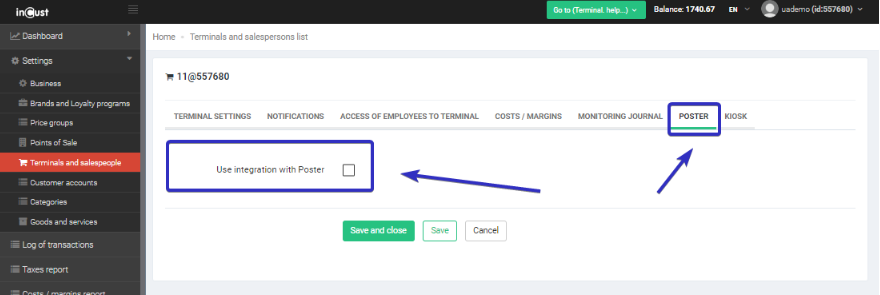
Click on the “Edit” button and go to the “Poster” tab, check the box “Use integration with Poster”.
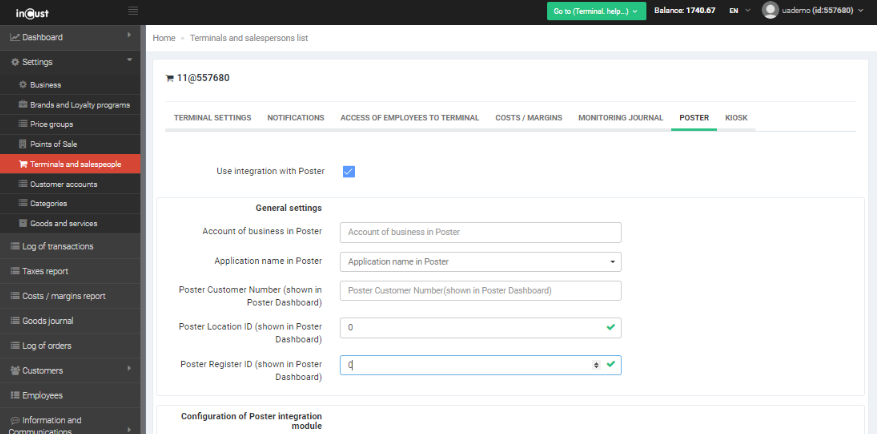
You will be presented with the settings described above:
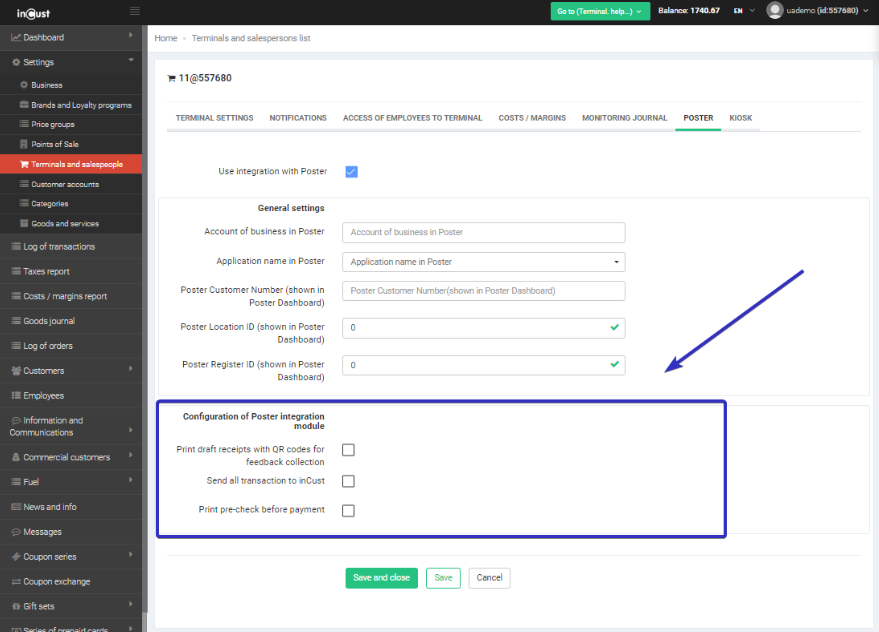
ATTENTION! Do not select the settings of “Configuration of Poster integration module” (the last three settings). If you are interested in these options, please contact us before enabling them.
- Account of business in Poster – where to find the accounting record is described in section 2.a of this instruction.
- Application name in Poster – this item needs to be selected from the “InCust” list.
- Poster customer number – where to find the customer number is described in section 2.b of this instruction.
- Poster Location ID – where to find the establishment ID is described in section 2.c of this instruction.
- Poster register ID – where to find the cash register ID is described in section 2.d of this instruction.
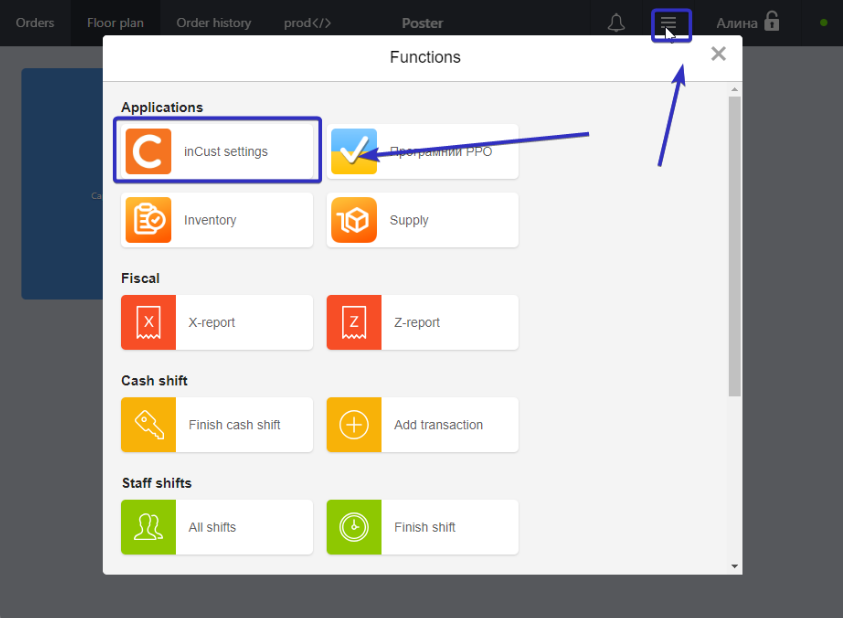
Go to the Poster cash register and log in again.
Make sure the connection is established:
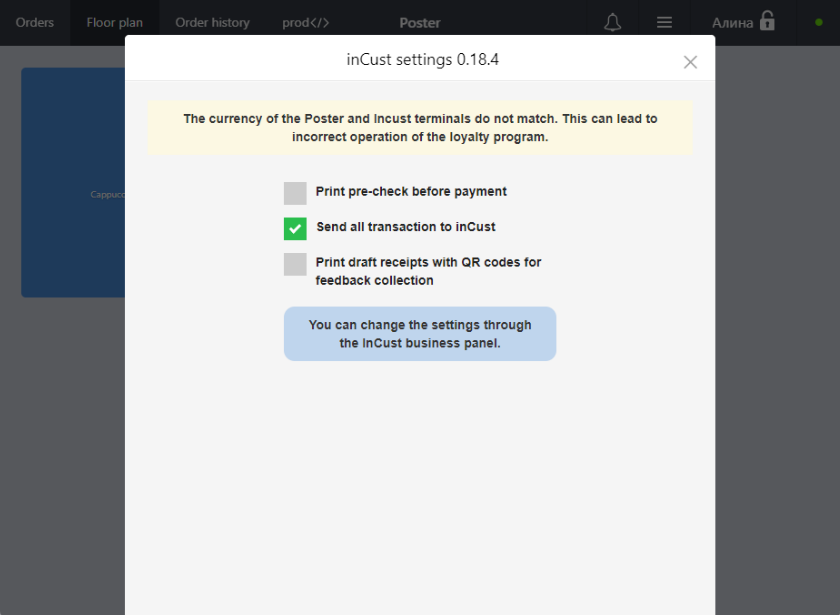
3. Working with the customer in the Poster register
During the sale transaction, press the menu (icon with three dots) and select “inCust: Choose customer”.
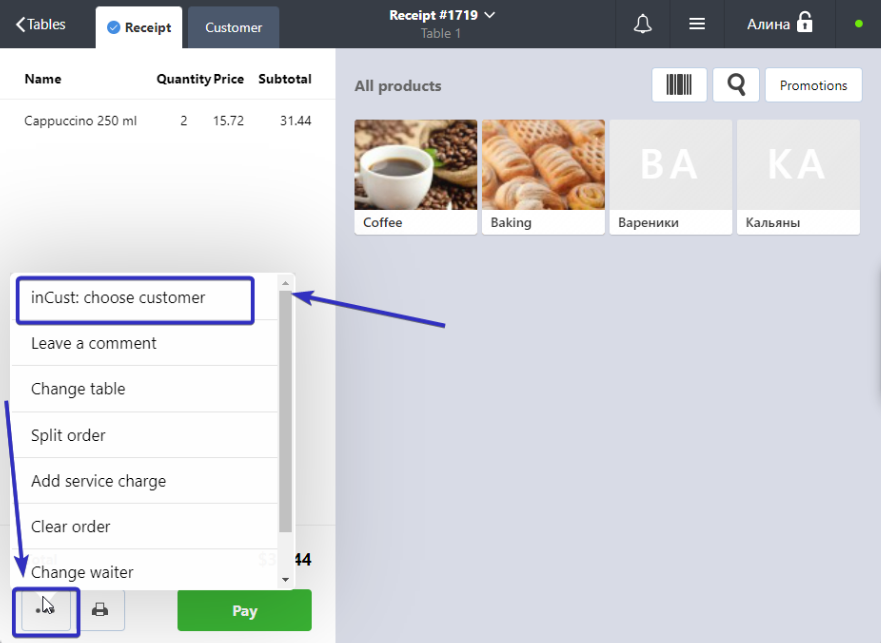
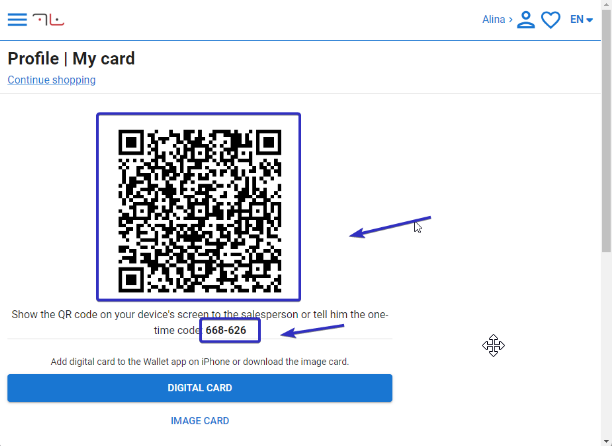
Next, on the screen, you will see a customer authorization window where you can enter the phone number or scan a QR code or authorize via email or enter a temporary customer code.
The most commonly used and convenient method of authorization is scanning the QR code in the customer application or chatbot, as well as using the temporary code in the customer’s wallet.
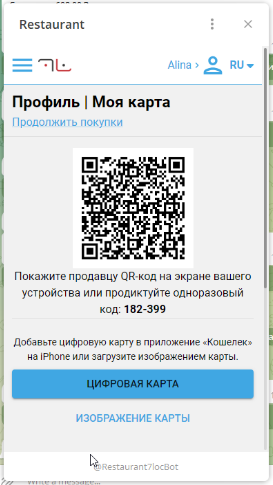
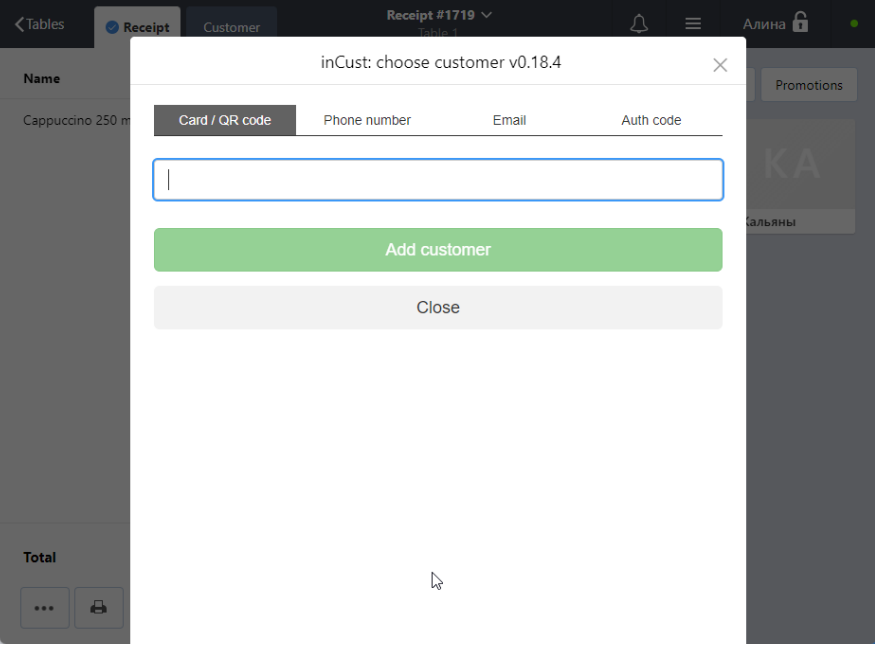
After authorization, you will see the Customer Profile. If the customer is already registered, you will see a filled-out profile. If the customer is new (authorized via email or phone), you will have the opportunity to fill out the customer profile. For registered customers, you will be able to see the number of bonus points in their account and other benefits in the customer’s wallet (account balance, coupons).
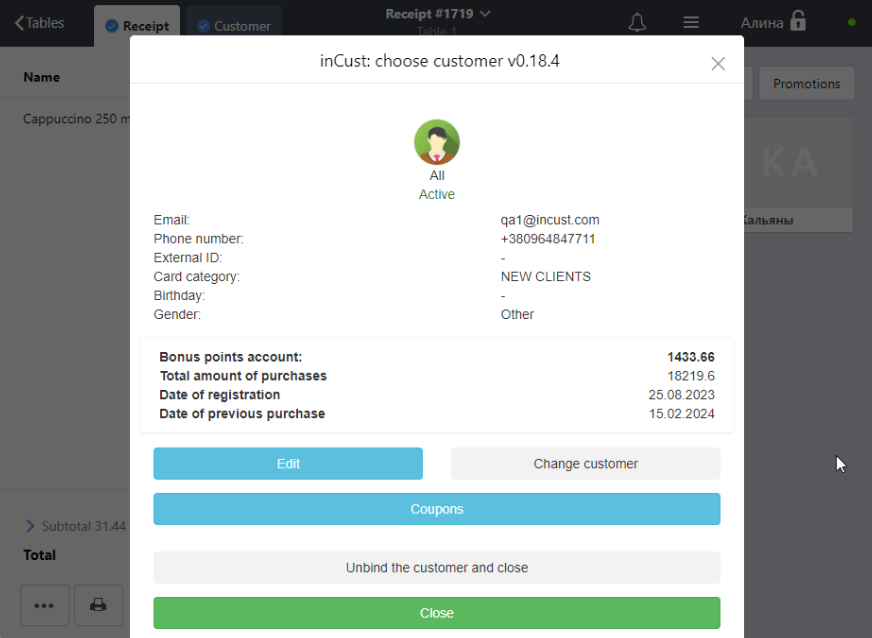
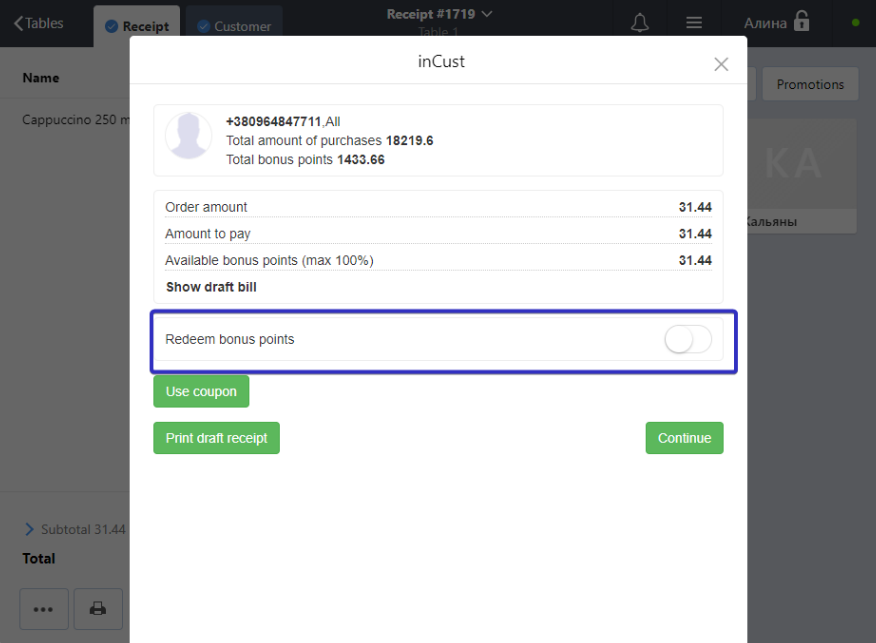
Press the “Close” button and continue to finalize the receipt. When closing the receipt, press the “Pay” button. A window will appear on the screen where you can redeem bonus points or apply a discount coupon depending on the loyalty mechanics you have set up and are using in inCust.
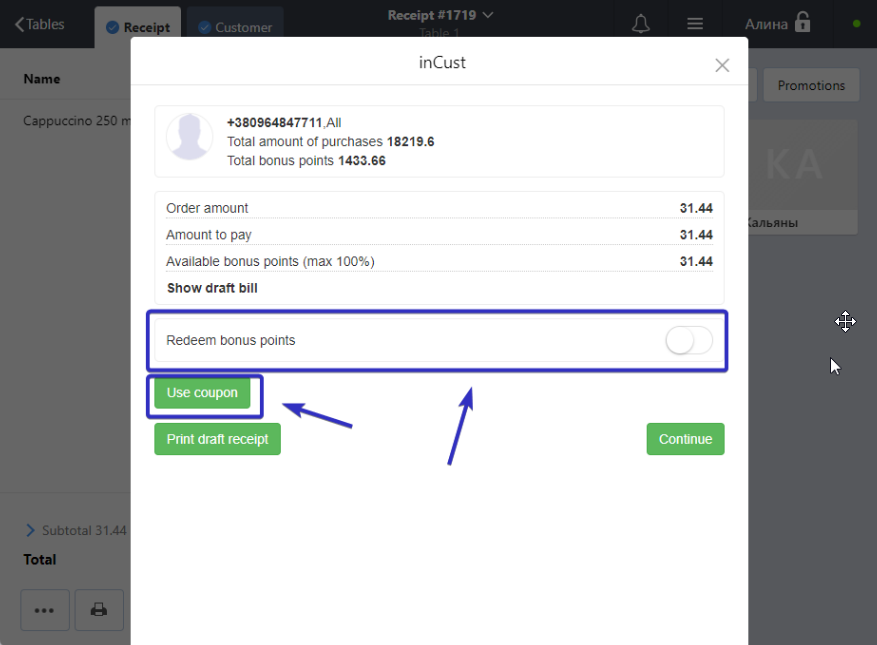
Next, press the “Continue” button. If you are finalizing the receipt without redeeming bonus points or if you have disabled confirmation for bonus redemption in the inCust settings, you will proceed to the receipt finalization screen in Poster. If bonus redemption requires confirmation, enter the code received by the customer via phone or email in the “Redeem bonus points” field that appears and press “Continue”.
